How to configure a static IP address in CentOS 7

A static IP address means that when you turn on your computer, it will have the same IP address every time, no matter what network you are connected to. This can be useful in some cases, like if you always want to connect to the same Internet service and don’t want your computer to be assigned another address when connecting to another network (like at home or at work). In this article, we’ll show you how to configure a static IP address in CentOS 7 and where to find it after doing so.
What is an IP Address?
An Internet Protocol address (IP address) is a numerical label assigned to each device connected to a computer network that uses the Internet Protocol for communication. An IP address serves two main functions: host or network interface identification and location addressing. Its role has been characterized as follows: A name indicates what we seek. An address indicates where it is. A route indicates how to get there. As far as the routing table is concerned, there are only two types of routes: destination networks, which specify a destination address, and default routes, which are used when a specific destination cannot be found in the routing table.
What is DHCP?
The Dynamic Host Configuration Protocol (DHCP) is a network protocol used to automatically assign IP addresses and other network settings to devices on a network. DHCP assigns the IP address, netmask, default gateway, and sets the DNS servers for the device. It’s called dynamic because it can change or be assigned as needed, meaning you don’t have to manually assign a new one every time you connect your computer to a new network. You may also need to set up a PPPoE connection. If you are using a cable modem with PPPoE authentication then you will need to provide username and password credentials for the PPPoE connection when prompted by the installation program.
Why do I need a Static IP Address?
Before you can configure a static IP address, you need to determine which network interface card (NIC) you will be configuring. To list all of the available NICs on your system, use the ip link command. The output from this command should look something like this: # ip link 1: lo: mtu 65536 qdisc noqueue state UNKNOWN mode DEFAULT group default qlen 1000 link/loopback 00:00:00:00:00:00 brd 00:00:00:00:00:00 2: enp0s3f0u1u2q3i4e5g6b7c8d9a-sfp-siirnnaaa valid lifetime 2792000sec preferred lifetime 604000sec mdadm_new 1827218/1827218 genlock 8/8 2333k
Installing the Modem Software
- To start, you need to install the modem software. You can find this online or in the App Store.
- Once you have downloaded the software, open it and follow the instructions.
- The software will ask you for your modem’s serial number.
- Enter the serial number and click OK.
- The software will now ask you for your IP address.
- Enter the IP address and click OK.
- The software is now ready to use!
Configuring the Network Interface Card (NIC) Manually
If you want more control over your network configuration, you can manually set your NIC’s IP address. To do this, you’ll need to open the Network Configuration tool. From the main window, select the Edit button next to the interface you want to configure. In the IPv4 Settings tab, select Manual from the Method drop-down menu. Then, enter your desired IP address, netmask, and gateway. Save your changes and exit the tool. You should now be able to connect to your network using the new IP address.
Configuring the Ethernet Connection in Linux
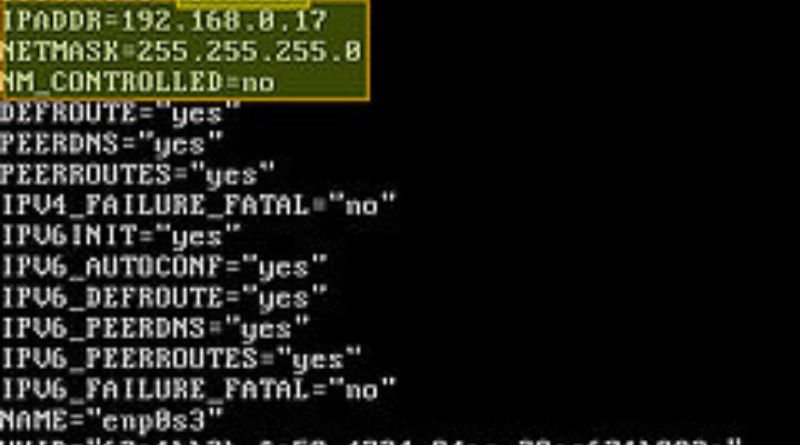
First, open the file /etc/sysconfig/network-scripts/ifcfg-eth0 and enter your information as shown below. Be sure to replace the items in brackets with your own information. After saving your changes, restart the network service by running service network restart or sudo systemctl restart network. Your Ethernet connection should now be configured for static IP addresses.


